Review of the electronicgeek.ca PRUSA I3 EG-1 3D printer (part 2)
Well, spend some time starting the assembly last night. Went up to step 4 of 24.
My first iritant was the hardware kit. All screws, nuts and small metal parts in 2 bags.


My first iritant was the hardware kit. All screws, nuts and small metal parts in 2 bags.

Sorting them out took a good 10m. Would be a plus if they come in separate labeled bags. I guess it's would cost more, but I see that it could be a barrier for some.

I did not count all parts but the ones I counted seemed exact with some spares. I did have one part that I could not identify:

Next I started on the assembly.... Second irritant, the acrylic parts are not labeled which in some cases makes you wonder if you are assembling the right parts as the assembly guide uses CAD drawing.

Putting ID on each parts (like IKEA) would be a big bonus. Also when assembling the motors there is no note in the assembly guide to which side you should put the wires which may make the wiring a mess if you don't think ahead.
Now the acrylic come with protective wrap glued to both side of the parts. These are a pain in the b**t to remove. In fact last night I could only remove the brown side and never got the clear side to come off (ok, maybe 2 glass of wine did not help). I'll try again today.
Some steps are also missing some pointers. Like here there it is hard to tell in which hole the "sliding rod restriction" parts should be tied to:

Adding leader lines or splitting these into extra steps may help a lot.
Now I'm a big fan of lock washers:
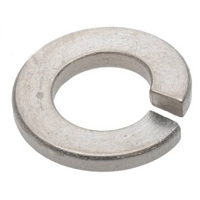
Lock washers are great for keeping screws and nut tight under vibration. There are no lock washers in this design which makes me think that some parts may come loose after some time printing, but we will see and I'll add some if needs be.
That's it for now. I'll continue during my lunch break today and maybe tonight.


Comments
Post a Comment