Review of the electronicgeek.ca PRUSA I3 EG-1 3D printer (part 3)
Made some good progress tonight on the assembly with the help of my oldest Benjamin. We are not at step 18.
Had some frustration with missing screws, most of which I was able to replace by some 4-40 screws I had. Unfortunately around here metric screws are hard to find.
The only 4 screws I could not really replace are the 4 screws holding the bed. I temporarily used 4-40 screws but could not use the supplied thumb nut used to adjust the bed level. Sent an e-mail to ElectronicGeek, waiting for a reply.
On step 5, I really suggest that you insert a smooth rod in the two bearing assembly to keep them aligned while tightening the screws. Had to slack them as they were not aligned and the rod would not slide.

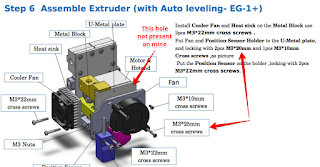
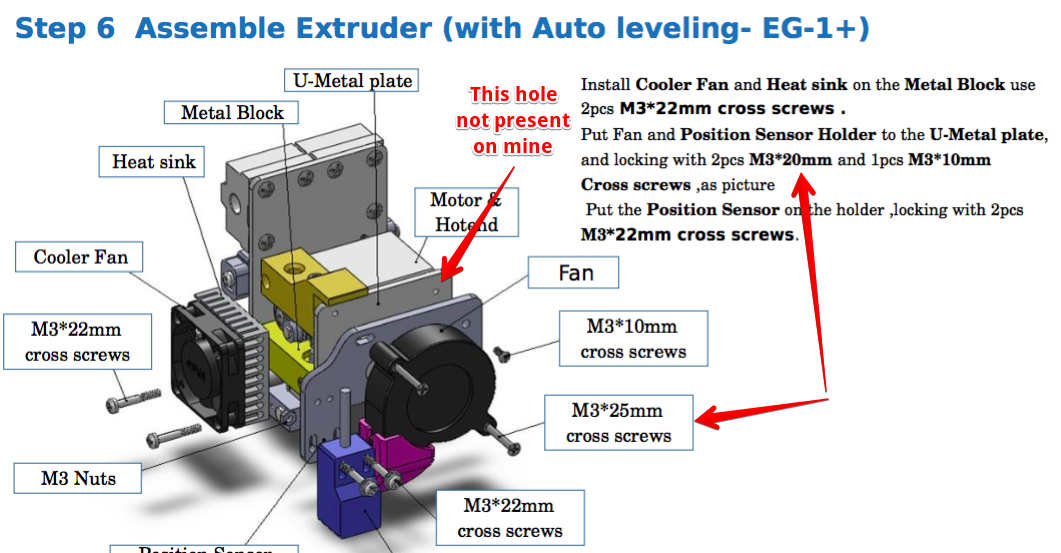
In step 6 for the auto-level option, careful about the screw length. 25mm screws are too long. Also on my assembly there were no threaded hole for the 10mm screw.
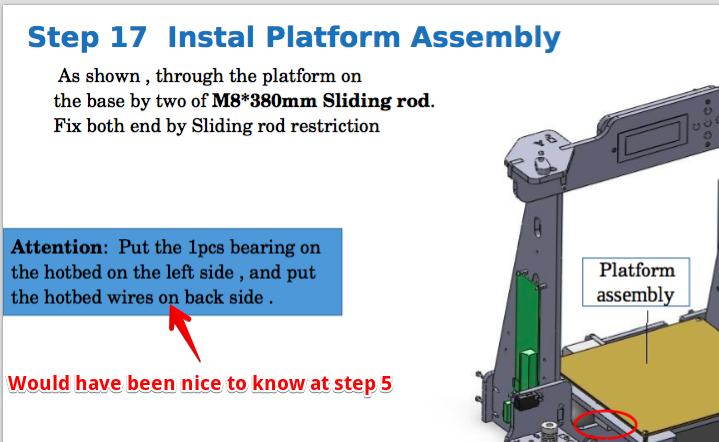
Nice note on the wire placement on step 17, but an indication in step5 would have been great also.
So that's where we are at tonight. Here are some picture of the assembly as I call it a night.


Comments
Post a Comment